Happy Hour: Focus Stacking with David Male
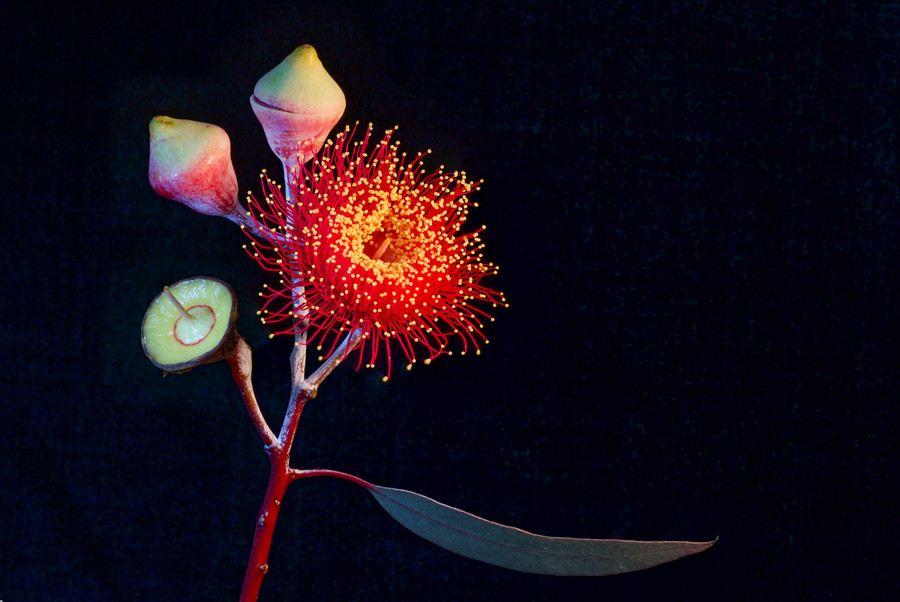
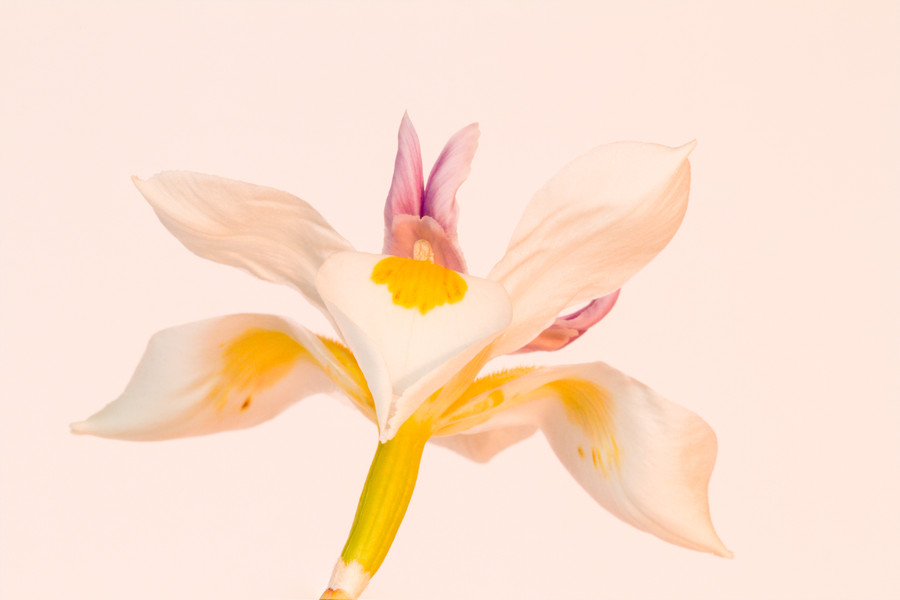
Flower 44 © David Male
Our Happy Hour meetings started as a way for us to remain in contact during the COVID lockdown, thanks to many awesome members we've been treated to a few presentations from our fellow members who are willing to share their learned skills with the rest of us.
This week, David Male shared his journey in Focus Stacking his macro photographs, he has also provided us with detailed notes about his process.
Introduction
Notes:
- LL seen in the documentation below: Lesson Learned
- All text in italics was added by the editor after the fact. All other notes are from David who was very gracious in providing us so much detail.
- Definition
Photo stacking is the process of combining multiple images of the same subject taken at different focus distances in order to extend the DOF of the image.
Another way of saying this is that it enables you to increase the sharpness of the image.
- Application
Two examples of the use of this technique could be for landscapes or macro.
- You may wish to photograph a scene that has a person or flower or a sign in the immediate foreground as well as an object that is 50m away and the DOF capability of the lens may not accommodate this with a single shot. This can be overcome by taking multiple images focussed at different points and stacking them in order to create a single image that is sharp from front to back (or over the required distance).
- Alternatively, you can apply the same logic to taking a close up image of a small object that is less that 0.5m from the lens, where the DOF is very shallow (say 3mm at f13) and the subject is (say) 20-50mm deep. Hence the term MACRO photo stacking.
- Methodology or Workflow
- Planning
- In camera
- Post-production
-----000-----
PLANNING
This is the most challenging and critical part of taking the image.
General Information:
There are 2 technique options here:
- Mount the camera on a tripod, compose the image, then take a series of shots that have been manually focussed at different parts of the subject. The camera does not move.
- Alternatively, mount the camera on a tripod in combination with a macro rail. The macro rail enables the camera to be moved forwards and forwards and backwards, side to side by small amounts. Hence the camera position can be adjusted in a controlled manner relative to the subject. With this technique, the camera moves but the point of focus does not change.
There are 2 types of macro rails (that I know of):
- Rack and pinion style: the movement adjustment on these is relatively course and not as refined in engineering terms. ie one full 360 degree rotation of the adjustment screw moves the camera approx. 28mm along the rail.
- Worm drive style: one full rotation here shifts the camera 4mm in a very smooth and controlled manner along the rail.
The enemy of macro photography is the wind. It is preferable to photograph indoors in a controlled environment. This may not be possible if you are trying to capture something in nature that cannot be moved eg a spiders web. Just be mindful that a puff of wind could move the subject 1 or 2 mm which, at this level of detail, could ruin the shot.
Equipment (non-camera):
The following is an indicative list of items that may be useful…
- small table, backing board, reflector, torch, standard lamp, tape measure, vase (or equivalent), blue tack, scissors, water spray bottle
- Backboard is mat board which is white on one side and black on the other to give David options.
- David also uses Black Velvet for his backgrounds.
Subject (eg flowers):
Be fussy. Pick a good one. It is no harder to photograph a perfect specimen than damaged goods (unless that is the intent). Repetition / experience will help teach you what constitutes ‘a good one’.
- Experiment with single blooms, multiple blooms, in combination with leaves, buds, seed pods, etc.
Composition:
Again, be fussy and experiment. Identify in advance what you want eg close-up of a part of the flower, a cluster of blooms, front on, side on, angled, from above or below, etc. Allow sufficient space around the subject to enable future cropping (if required).
- TOM PUTT philosophy – treat inanimate objects like people.

Backgrounds:
Dark, light, coloured, ‘natural’, uncluttered (not distracting). Remove the parts of the subject that are not relevant or that do not complement the overall intent.
- Use of different coloured cards, black velvet
Light:
If photographing during the day, try to maximise the natural light (ideally) through a north facing window. This may need to be supplemented with artificial light. Start with the minimum assistance and build up. Eg reflector, desk lamps, torch light, off camera flash
- Front lighting, back lighting, rim lighting, shadows, etc
- LL: DO NOT mix and match light sources / kelvins as these can distort the colour tones of the image
- LL: DO NOT use too much light as this will prevent details in the subject being captured.
Note: I am yet to experiment with the use of flash lighting.
-----000-----

IN CAMERA
The following are mostly technical information relevant to camera / equipment settings. The aim is, as best as possible, to get the shot right in camera. ie minimise post-production editing.
Equipment (photographic):
The following are the key items I used. These may be substituted by a variety of other options:
- Canon 7D SLR
- Canon 100mm macro lens, f2.8 (macro lens optional)
- Canon 25mm extension tube (optional)
- Sturdy tripod
- Remote shutter control (Optional – use 2 second delay)
- Macro rail (optional) (‘Velbon Super Mag Slider’)
David showed us the "Velbon Super Mag Slider Upper" which has only the back and forward movement. This product appears, at least in my quick research, to be a now discontinued product with Velbon only having the Velvon Super Mag Slider on their website. You can still find supply of the "Upper" version of this product on eBay and from limited camera suppliers. - DOF App (‘SetMy Camera’, free) (optional)
Equipment settings:
Camera:
- ISO: be careful not to introduce digital noise. Max ‘safe’ setting for Canon 7D = ISO 400.
- F stop: stick to mid range, as close as practical to the lens ‘sweet spot’ (= f11-f13 for above lens). Avoid maximum and minimum settings as these can introduce diffraction.
- Shutter speed: Not too slow, despite using tripod. Ideally no less than 1/15 th second.
- Exposure: typically under expose the image by 2/3 stop to ensure NO blowouts. Readjust as required in post-production.
- Focus: Spot Focus mode.
- White Balance: No clear decision here. Experimented with AWB, Daylight, Shade, Tungsten.
- Note: I did not set the camera mirror to Lockup position.
Lens:
- Set Image Stabiliser switch to OFF
- Set focus switch to MANUAL
- Set ‘distance’ switch to match the actual focussing distance eg 0.3-0.5m
Note(LL): The distance stated on the lens is measured between the near point of the subject and the focal plane on the camera body. NO adjustments should be made to compensate for the inclusion of an extension tube OR to allow for the difference between a full frame camera and a crop factor camera.
- Extension tube: their purpose is simply to magnify the subject.
The amount of magnification (M) is equal to the length of the extension tube divided by the focal length of the lens.
Example: (for the above equipment) M = 25mm tube / 100mm lens = ¼ = 25%.
The 100mm lens now has an effective magnification of 125mm.
Macro rail Setup:
Having setup the camera on the tripod and composing the image, measure the distance between the front of the subject and the focal plane mark on the camera. Use this information, in conjunction with the f stop (say f13) to calculate the DOF using a phone App. Eg Distance = 40cm, aperture = f13: DOF = 6mm ie =/- 3mm. Not very much DOF!
We now know that the separation between images needs to be very small. In this example, I would keep the intervals to (say) 1mm. I am not sure whether this is too conservative or not, but taking extra shots does no harm.
Now measure the depth of the subject, along the line of the axis of the lens. If this is (say) 30mm, we will now need to take a total of 30 shots.
Set the macro rail 30mm from the end of its adjustment position so you will know when you have taken the full range of shots.
Note: Prior to the first use of the Velbon macro rail, it will need to be ‘calibrated’ in order to determine the amount of movement the camera will travel with each turn of the adjustment screw.
Taking the Photos:
On completion of all setup requirements (composition, lighting, camera settings, macro rail adjustments) we are now ready to shoot.
Using Live View mode, magnify the subject by pressing the + (plus) button to magnify (do not use the Lens zoom ring to magnify). Shift the point of focus onto the nearest part of the subject and focus as precisely as possible. Take the first shot.
Critique it carefully. Check the background to ensure there are no surprises or that nothing has moved. Be fussy. If you are happy, continue. If not, fix the problem and recheck with another test shot. In this situation, you need to have a method of identifying which photo is the first one in the set so I typically put my hand in front of the lens and take another shot in order to separate the old from the new.
Shift the macro rail (say) 1mm towards the subject and take another pic. Repeat (say) 30 times until the macro rail cannot adjust any further.
The set of images is now complete.
-----000-----
POST-PRODUCTION
Equipment:
- Lightroom 5 (note Lightroom 5 is long superseded... you can get Lightroom Classic or Lightroom CC from Adobe)
- Focus Stacker (photo stacking software)
(This software automatically detects sharp areas from each image and combines them into a seamless composite)
Workflow:
- Download the set of images from the camera card into LR5 to the
required location. No adjustments are carried out to the images at this stage.
Editor: This would be the best time however to apply any required lens correction and correction for chromatic aberration. Though given the settings used you may not see a lot of either so if you don't do it, it may have no discernible impact on your final result. - Drag and drop the full set of images from the LR Library module
into the Focus Stacker icon in the dock. This will activate the software and the message ‘Stacking Images’ will
appear. Depending upon the number of images to be stacked, and the speed of the computer, this may take quite
some minutes.
Editor: Dragging images directly from the Library section of Lightroom will result in the original images to be copied out... any adjustments made in Lightroom will not be reflected in your output. If you have made changes prior to sending to your stacking software you may prefer to Export your photos rather than dragging them directly from the library view. If you are importing RAW images from your computer you may also run into an issue if the resulting software doesn't have support for your type of RAW image. - On completion, a stacked image will appear. SAVE the image with a new filename and store it at the required location in order that it can be re-imported to LR. The default format is a .jpeg file.
Note: there is a user defined option here to save the image in JPEG or TIFF or PNG format. I selected TIFF as I believe these files contain a greater amount of data ready for future editing. Press * next to the Save button to display this option.
- Re-Import this stacked file into LR. Carry out any edits as required via the Develop module.
Note: The stacked image will always need to have a minor crop around the perimeter as during the stacking process a narrow border is created that needs to be removed.
- Finito!
-----000-----
OBSERVATIONS
Colour…
- This is clearly affected by two things – the light source (or
type) and the camera White Balance settings. For me this is still a work in progress that needs more input to
achieve a consistent and predictable result. The colours achieved directly from the camera do not always reflect
the actual colour of the subject
Christine commented during this part of the presentation that a grey card may be used to assist with the white balance. - I am yet to venture into the use of off-camera flash in combination with photo stacking, but it will be interesting to see what happens.
Backgrounds…
- This is a personal choice that defines both the subject and the maker. The prime options for backgrounds seem to be either black or white (light) for images taken in a controlled environment. This discussion disregards images taken in their natural environment.
- Black backgrounds are ‘safe’. They are clinical, conservative and decisive. They are a substitute vignette that traps the viewers eyes by constraining the subject and hence ensures you look at that subject.
- White (or light) backgrounds are risky and adventurous. They provide an artistic or creative environment for the subject to be displayed. They establish choices for the viewer that requires interpretation and judgement. By allowing the eyes to wander, the maker must ensure that the photo has a definitive point of interest that commands that the eyes always return to that point.

Macro rail increments v’s camera setting DOF…
- There is no doubt an optimum ratio, or at least a ‘safe’ ratio, that defines the relationship between the camera DOF settings and the interval between shots taken when stacking. This also is still a work in progress.
- Typically, I choose to err on the conservative side by taking more shots than are probably required.
Composition…
- This is a never ending journey of experimentation to find the perfect subject and then capture it in a manner that shows it off to perfection.
-----000-----
David Male,
Williamstown Camera Club
August 2020
Other notes: Christine mentioned that she has a Sony mirrorless and is continuing to use her Canon lenses with a Sigma MC-11 converter which allows her to use her Canon EF mount lenses on the Sony E-Mount system. This is a much less expensive alternative to ditching your whole kit if you feel like you may want to move to Sony.