Flash-n-Blur: Stroboscopic Imagery
During last night's meeting we were introduced to the concept of stroboscopic imagery and we talked briefly about the use of the rear/second curtain for effect.
I admit that I thought I had more time to prepare for this meeting and the practical elements, but the need to reshuffle the calendar meant we had to move this meeting up, so I didn't get around to developing a practical demonstration of the second curtain in flash photography. I have, however, provided a couple of video tutorials at the end of this article that should help you out.
Big thanks to everyone who attended, especially those who stood in front of my lens in front of the club. Your support is greatly appreciated.
Let's kick things off with Stroboscopic Imagery, we'll follow up with a second curtain flash article in the next few days.
Stroboscopic Imagery
Stroboscopic imagery has been around for scores of years. In practical photography it was came to the fore after 1931 when Harold 'Doc' Edgerton created the first "electronic strobe light stroboscope" allowing him to capture motion in stuttered stills. His invention went on to become our modern flash and Doc Edgerton is responsible for many iconic freeze-frame images including the famous " Bullet Through Apple".
The stroboscope was used to explore a subject's movement. It has been used throughout the years since its invention to study movements in sports, animal studies, and in industrial design to study the movements of components.
Essentially the way it works is a repeating flash is fired during a long exposure to illuminate the subject multiple times in a single frame. The frequency of flashes and the shutter speed are the main determiners for how many times the subject is illuminated as they move through the scene. Early versions were just strobe lights that continuously fired, these days we're using flash units that will overheat if we allow them to just keep flashing. So we need to also tell the flash (or camera) how many times we want it to fire in total, increasing the settings we need to set.
All the settings we need to set are:
- Flash needs to be set to its stroboscopic setting, this may be "Multi", "Repeating Flash", "Strobo" depending on your brand of flash.
- Frequency (Hz): how many times per second should the flash fire.
- Number of Flashes: total number of times the flash should fire.
- The flash power output.
- The duration for which the shutter should remain open (shutter speed)
The shutter speed is determined by dividing the number of total flashes by the frequency; if the total number of flashes is 20, and the frequency is set to 10Hz, we'll require a shutter speed of at least 2 seconds to ensure we capture all of the exposures (10 flashes per second)
Num flashes / Frequency = Minimum Shutter Speed
| Num flashes | Frequency (Hz) | Shutter Speed |
|---|---|---|
| 40 | 20 | 2 sec |
| 8 | 16 | 0.5 sec |
| 5 | 1 | 5 sec |
You can control your exposure using the flash power, your aperture, and your ISO. You need to determine these depending on your creative decisions. Trial and error is thoroughly recommended until you find a setting that suits your goal.
Please refer to your flash's manual to find out where these settings are set. For some, like Nikon, they are actually done in camera. While Sony and Canon have them available on the flash, and in some cases, in camera menus. There are too many variables though to list them all here. In your manual you're looking for the terms "Stroboscopic", "Repeating Flash", "Multiple Flash", or something like that.
Setting the scene
- A dark room, the less light the better.
- Dark background
- A clean scene
The flash will be your only source of light when exposing. Because the whole scene is being lit each time anything that remains still, such as parts of your subject or other elements in the scene, will become brighter with each successive flash firing.
If your subject is remaining mostly static, but only moving limbs, you might opt for darker-coloured clothing; white or light clothes will likely become over exposed. If, however, you subject is moving through the frame (running, dancing, etc) lighter coloured clothing will see them stand out more, and may prove a good choice.
Things to consider
- Ensure you have enough time
Consider the movement of the subject in your frame, do you have enough time in total, or between flashes for them to make movements or switch positions? - Ensure you don't have too much time
Too much time exposing the scene will result in ambient light leaking into your image, you may want this, but just ensure it is happening due to a creative decision rather than because your exposure is running long. - Ensure you have enough power
Stroboscopic photography will use a lot of battery power. I use a Godox PB960 battery pack* to power my flashes, ensures I don't run out of power. - Make sure you don't overheat
Firing a flash many times may result in it overheating. Thankfully many flash units these days are built with internal thermostats to ensure this doesn't happen, they will stop firing when they are overheating. Some also restrict your choice of flash output power based on the frequency and number of flashes you have set. But be aware that others, most likely the less expensive brands, may not, so just be aware. Give your flash time to cool down between shots if you are making many high-powered exposures. - Ensure there is nothing extra in your shot
As previously mentioned, anything that stays still in your scene will become brighter with each successive flash firing. Remove anything not necessary to your scene so it doesn't become a distraction. - Stay safe
This is done in relative darkness, ensure there is nothing for you or your subject to fall over while making these images. - Play, try things, have fun
A lot of stroboscopic photography is trial and error, whether it's the amount of time you need for your subject to get their movements in, the number of flashes you need to get the look you're after, or the flash output power to expose your subject correctly. Enjoy the discovery, relish the failures for what they teach you.
You don't need a strobo-capable flash
To get the same effect without a stroboscopic flash you can try the following:
- Set your scene as above
- Set your exposure time long enough for your subject
- Set your flash output power
- Start the exposure on your camera
- Manually trigger your flash by pushing the test fire button as many times as you would like exposure to appear.
Your results will be more limited and may be more stuttered as you'll be unlikely to enjoy the frequency control the stroboscopic flashes will produce, however, it's no reason not to give it a go!
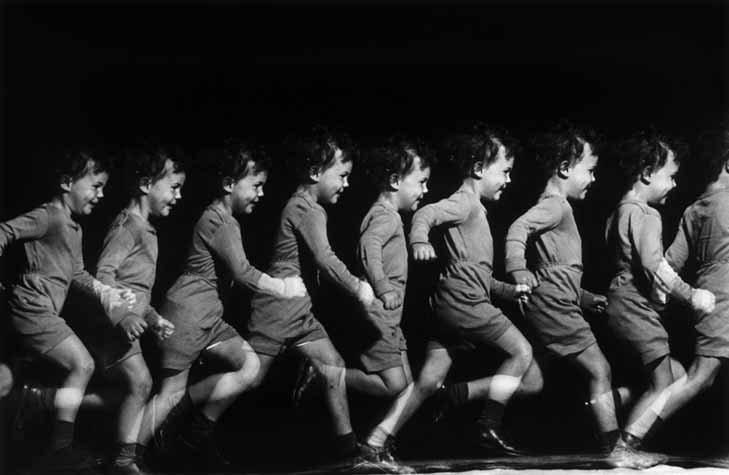
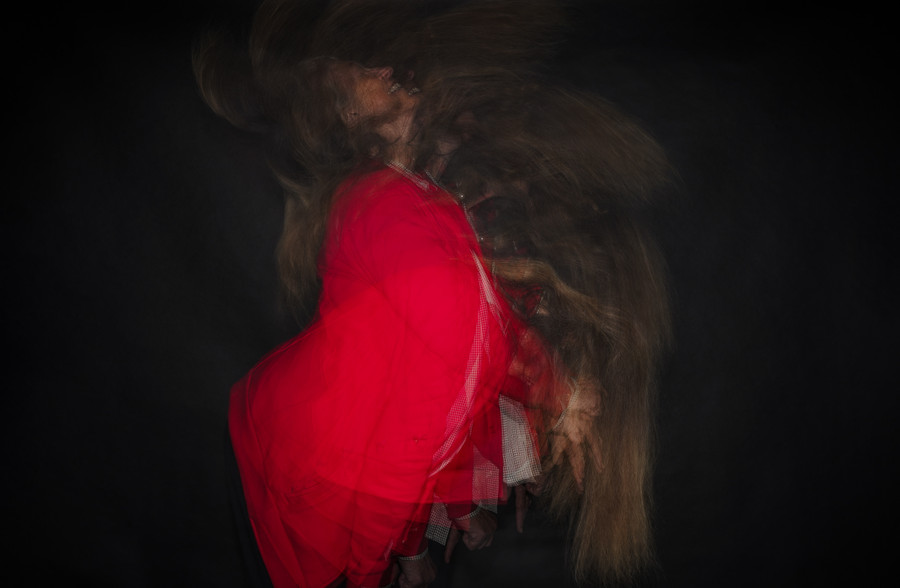
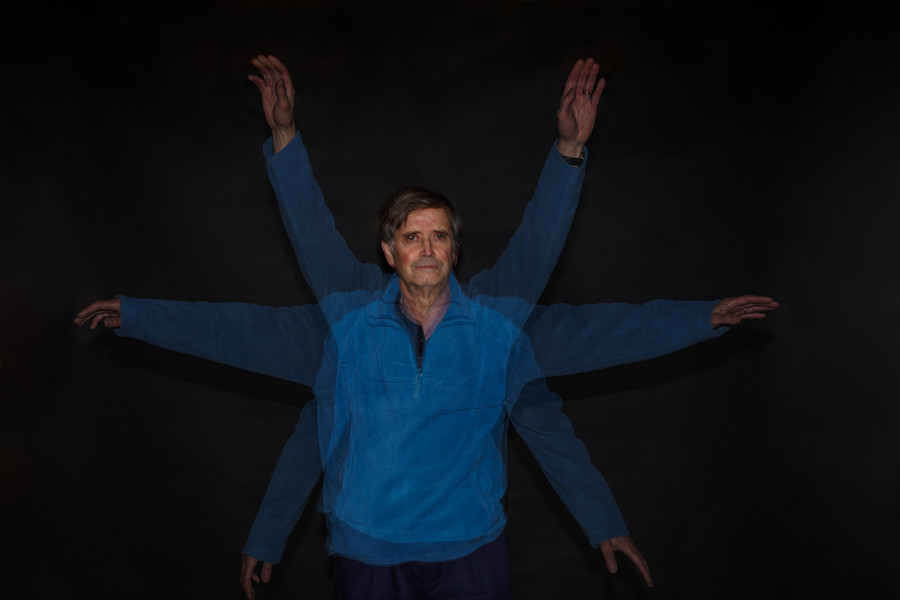
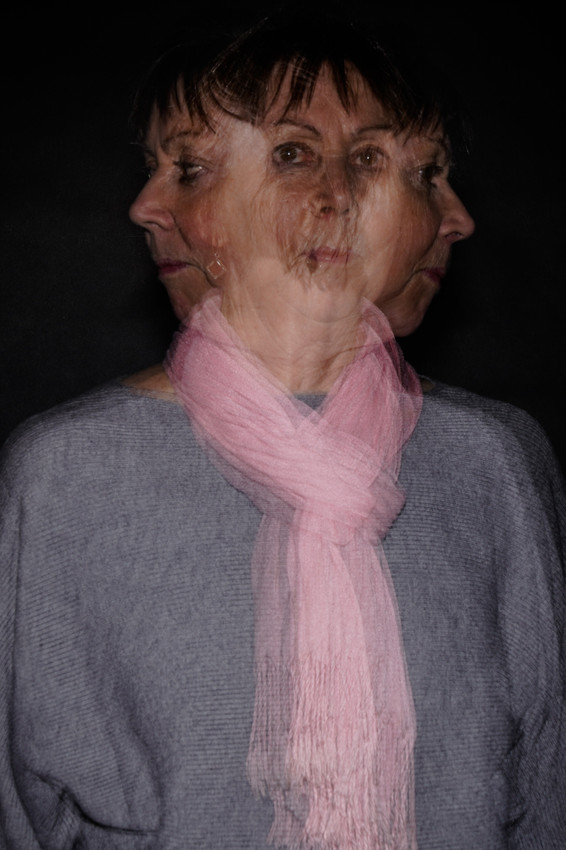
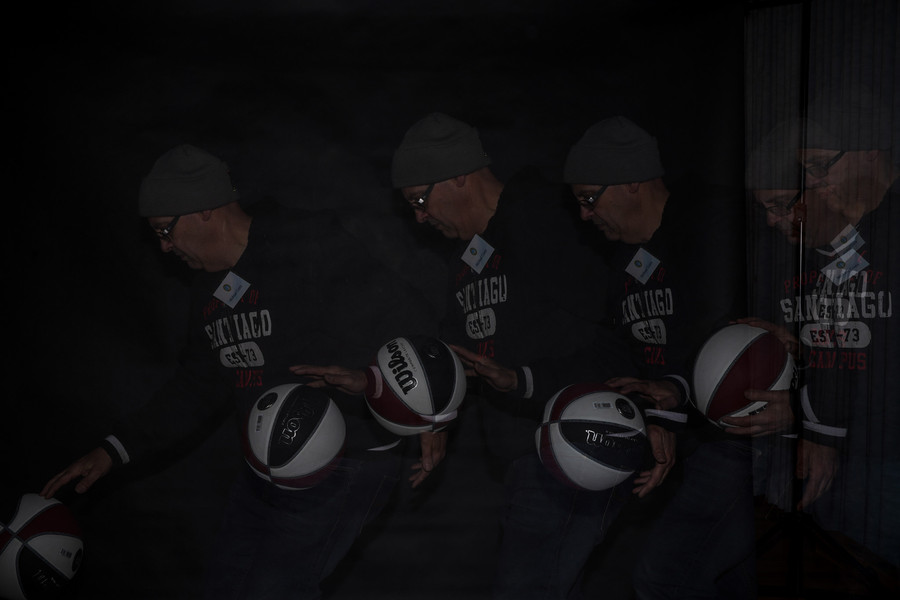
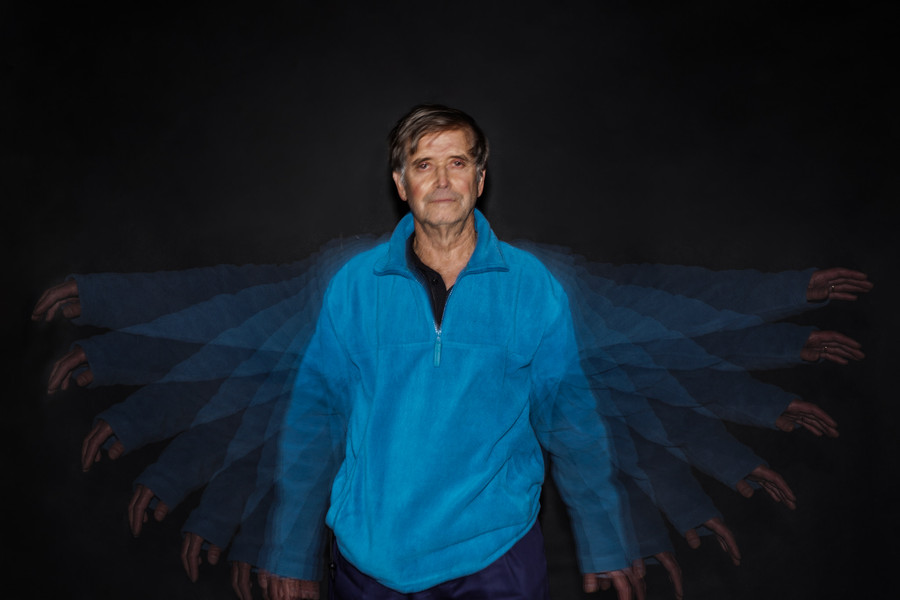
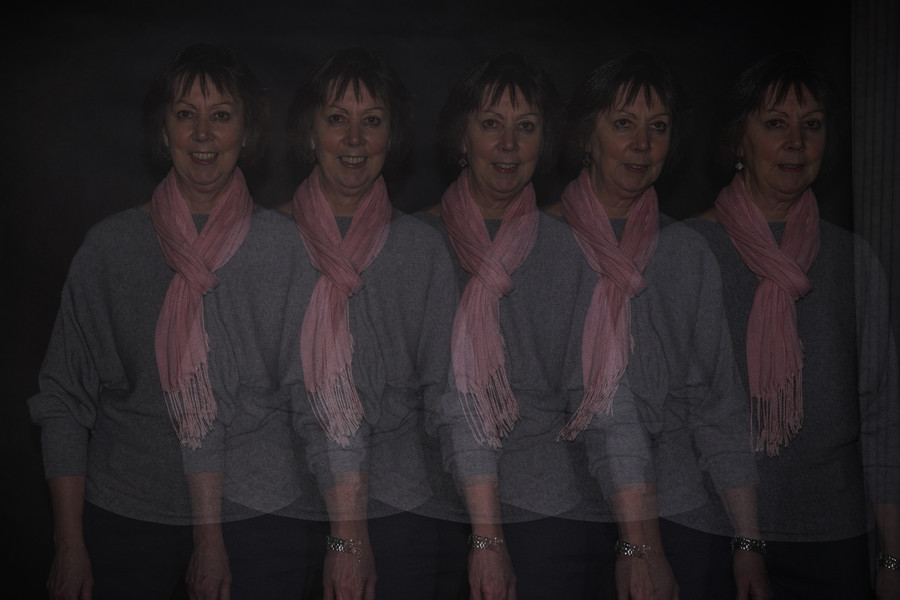
Below are some of the images we made last night using the techniques above.
Video Resources
If you're still a bit confused, I was until I started doing it, you can check out the videos below.
*NOTE: You also need to purchase the right cable accessory for your particular brand of flash, and it doesn't support all flashes. ie the Canon cable supports the 580EX and the 600 series flashes, but not the 430EX, so check you can get the right cable before purchasing. Also, the original manufacturers have their own power packs you can purchase such as Canon's CP-E4N for their 600 series flashes.
Download the original presentation - Some images and effects don't work in this PDF version.